


Quick start: the big idea behind these changes
T’au win games by controlling lines of sight, keeping enemies at range, and setting up turns where your shooting deletes a priority target. The new focus here is the Hidden / detection range rules and the new detachments that help you:
-
Shoot while staying safe (stay outside detection ranges)
-
Reveal hidden enemies so your best guns can target them
-
Use auxiliaries (Kroot, Vespid) to enable your shooting pieces
-
Power up commanders and battlesuits with prototype tech
The rules concept you must understand: Hidden & detection range
This faction focus references “hidden” rules and “detection range”. Here’s the beginner translation:
-
Hidden units are harder (or impossible) to target unless you’re close enough to detect them.
-
Detection range is how close you need to be to “spot” a hidden unit. The article calls out a standard detection range of 15”.
-
If you can’t detect a hidden unit, you often can’t make it a valid target for your shooting.
How to leverage this as T’au: play at ranges where you can shoot the enemy, but the enemy can’t easily shoot you back. Then use your recon tools to temporarily increase detection range when you need to remove a hidden threat.
Detachment 1: Advanced Acquisition Cadre (Stealth & recon play)
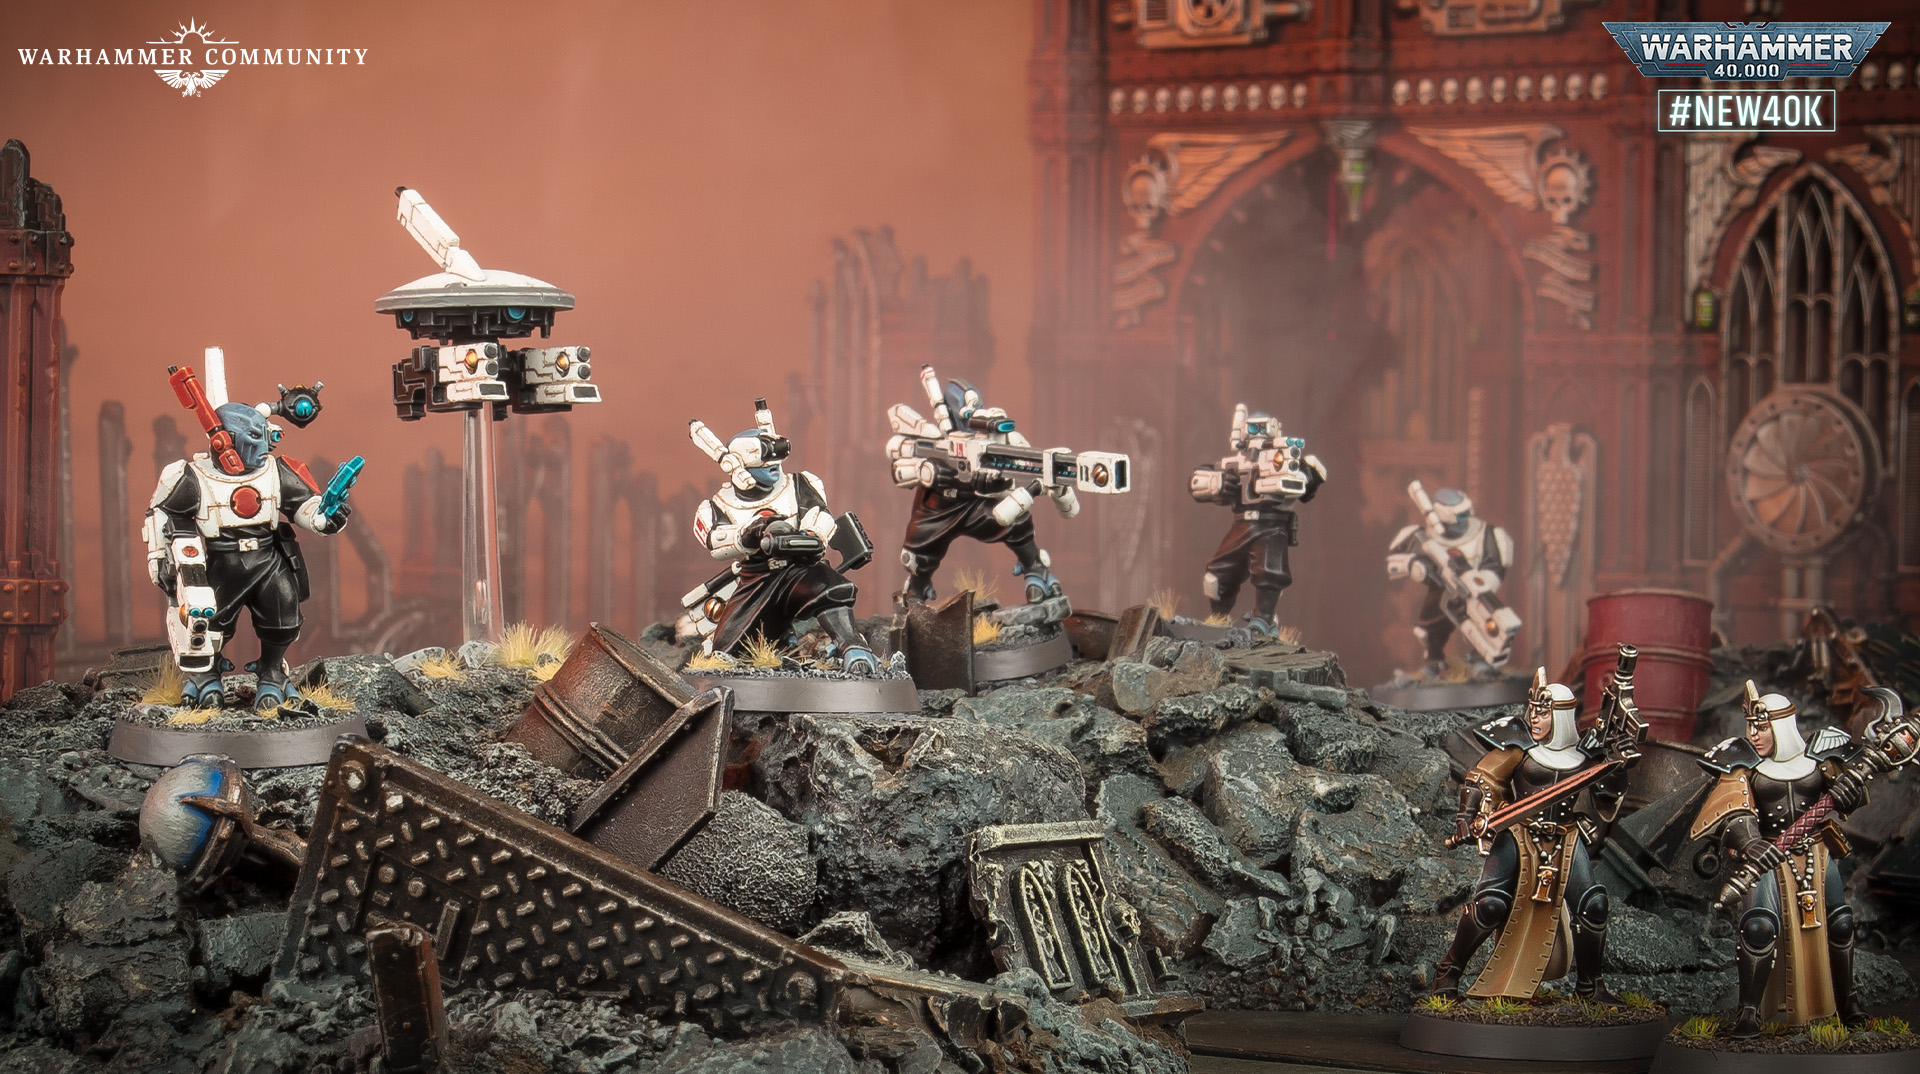
This detachment is about your stealth and reconnaissance units taking advantage of the hidden/detection rules: staying undetected, shooting safely, and choosing the moment to reveal targets.
What this detachment helps you do
-
Keep key units safe by using distance and stealth.
-
Control when engagements happen: you decide when to step into detection range and when to stay out.
-
Pick off targets from outside “normal” detection ranges.
When you should pick this detachment
-
You like a cautious, positioning-heavy game plan.
-
Your list includes units like Pathfinders, Stealth Battlesuits, and/or a Ghostkeel.
-
Your local tables have lots of terrain and angles where “being seen” is a constant problem to solve.
Key tools explained (in plain language)
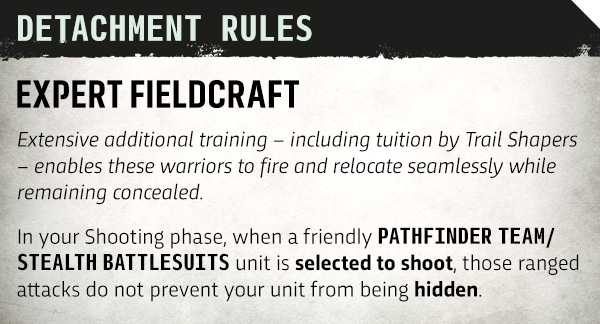
Expert Fieldcraft (Pathfinder Teams)
-
What it means: Pathfinders can operate at longer ranges, letting them stay outside the typical 15” detection range while still contributing fire.
-
How to use it: deploy them where they can see lanes of the board, then keep them far enough back that enemy “spotters” have to overextend to shoot them.
-
Beginner tip: don’t drift forward “just to get a better angle” if you’re already in range to shoot. Staying back is often the whole point.
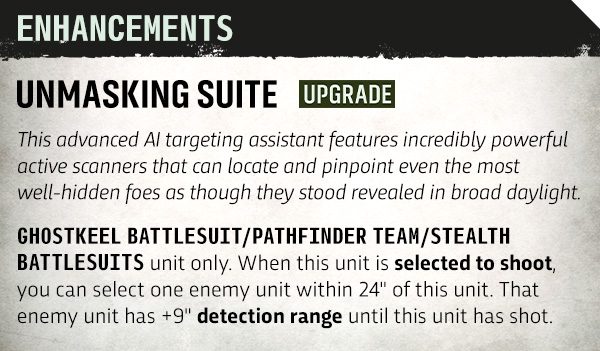
Unmasking Suite (enhancement)
-
What it means: up to three of your recon units can reveal targets, increasing detection range up to 24” (as described in the article) until their attacks are finished.
-
When to use it: when a hidden enemy is blocking your plan (for example: sitting on an objective, screening your Deep Strike, or threatening a key unit next turn).
-
How to leverage it: reveal the target, then concentrate your best shooting into that unit immediately. Don’t “half-commit” — if you spend a reveal, cash it in.
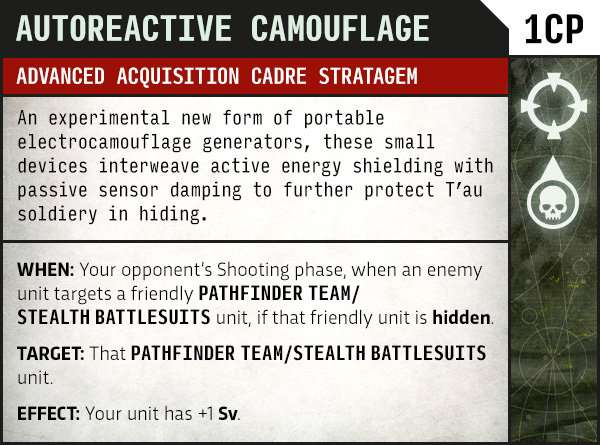
Autoreactive Camouflage (defensive boost)
-
What it means: increases survivability, including improving Stealth Battlesuits to a strong save.
-
When to use it: when you expect the enemy to finally get close enough to detect and shoot your stealth pieces.
-
Beginner tip: “hidden” isn’t invincible — plan for the moment the opponent closes the gap.
A simple beginner game plan (one-turn example)
-
Before your Shooting phase: position Pathfinders/Stealth so they can shoot while staying outside easy detection.
-
Pick one priority target: the unit that will hurt you most next turn, or the unit holding an important objective.
-
If it’s hidden: use Unmasking Suite to reveal it.
-
Then: focus fire until it’s gone. Don’t split shots unless you’re very sure.
Detachment 2: Auxiliary Cadre (Kroot & Vespid enabling your shooting)
This detachment is about using auxiliaries to do the “dirty work” — moving up, spotting, taking objectives — so your battlesuits and gunline can do what they do best: shoot.
What this detachment helps you do
-
Spot hidden enemies so your guns can legally target them.
-
Control objectives early with bodies (Kroot) while your expensive units stay safe.
-
Apply pressure with Deep Strike (Vespid) and sudden board presence.
When you should pick this detachment
-
You struggle to play the mission because your list is “all guns, no board control”.
-
You want Kroot/Vespid to matter beyond being cheap screens.
-
You like combined-arms play: scouts spot, battlesuits finish.
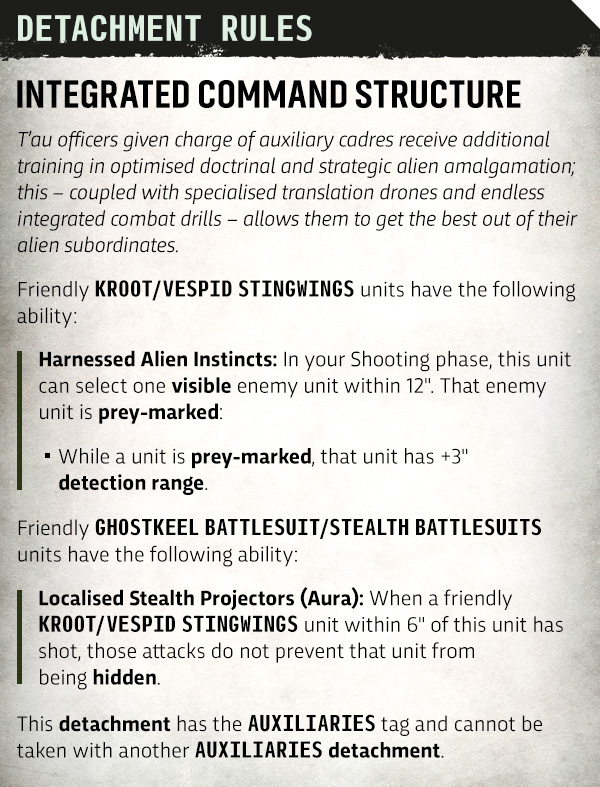
Kroot extending detection (spotting support)
-
What it means: Kroot placed ahead of your line can help extend detection into hidden enemy groups.
-
Why it matters: the article notes For the Greater Good needs the target to be visible — so spotting isn’t just “nice”, it can be required to turn on your best synergies.
-
How to use it: push Kroot onto mid-board angles where they can spot, even if they aren’t expected to survive long. Their job can be “spot once, enable the kill.”
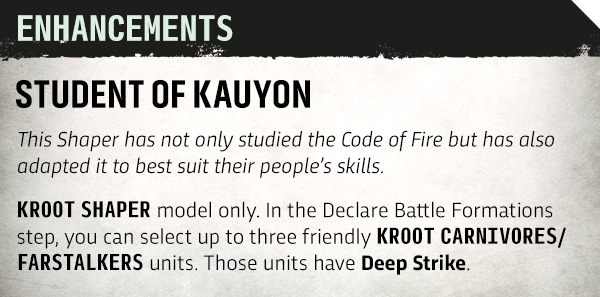
Student of Kauyon (on a Shaper)
-
What it means: helps Kroot get up the board (the article describes a dramatic “out of nowhere” drop for multiple units).
-
When to use it: when you need to suddenly contest objectives, screen out enemy Deep Strike, or create spotting positions that didn’t exist last turn.
-
Beginner tip: use big Kroot units to take space — don’t be afraid if they die, as long as they win you tempo and scoring.
Guided by Unity (stratagem)
-
What it means: a damage push when your auxiliaries are close enough to set up the situation, and your shooting unit is ready to capitalize.
-
How to use it: set up the “enable” first (Kroot/Vespid close, Stealth suits in position), then spend the stratagem on the unit that will get the most value from it (high rate-of-fire weapons love extra payoff).
Detachment 3: Experimental Prototype Cadre (Commanders & battlesuit power)
This detachment is a straightforward beginner choice if you love commanders and want your battlesuit “hero unit” to feel even more impactful.
What this detachment helps you do
-
Improve commander-led units so they hit harder and/or play safer at range.
-
Make Deep Strike plays more reliable for short-range weapons (like melta-style guns).
When you should pick this detachment
-
You want a simple plan: “set up commander unit, pick target, delete target.”
-
You’re learning positioning and want your list to be forgiving (more range and stronger output can forgive small movement mistakes).
Extra range + Deep Strike (why it matters)
-
What it means: extra range helps keep you away from charges, and can help a commander leading Crisis Sunforge battlesuits get fusion blasters into their best damage band after Deep Strike.
-
How to leverage it: Deep Strike where you threaten a valuable enemy unit, but also where you have a plan for surviving the counterattack (screens, terrain, or trading up).
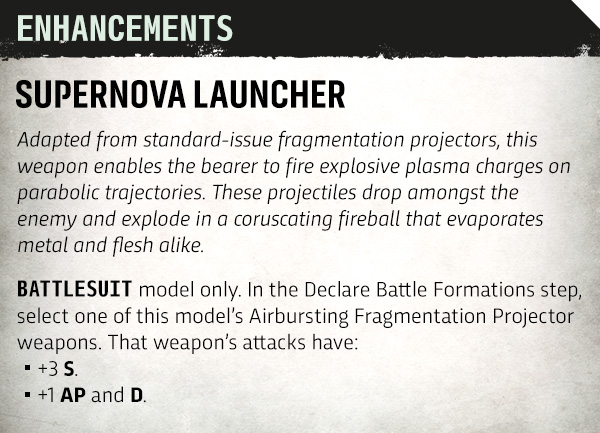
Supernova Launcher (enhancement)
-
What it means: upgrades a commander weapon into a much scarier “prototype” option.
-
When to use it: when you need a commander to threaten tougher targets or clear durable units off objectives.
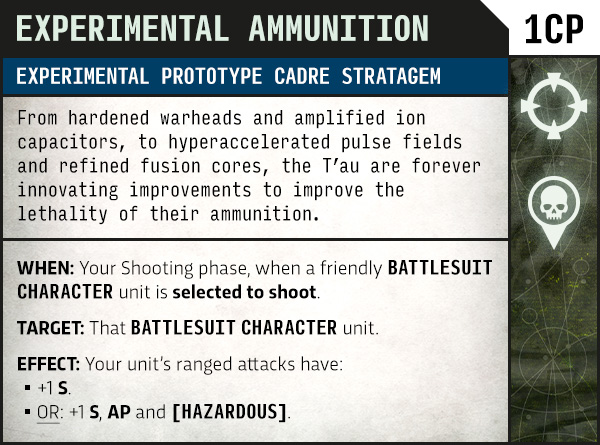
Experimental Ammunition + Hazardous choice (risk vs reward)
-
What it means: you can push damage higher, but taking the Hazardous option carries risk (you roll for each weapon you fire).
-
Beginner rule of thumb: go “all-in” when removing that target will win you the turn (stopping a charge, killing a key monster/vehicle, or swinging an objective). Don’t risk it just to overkill something that was going to die anyway.
How to choose between these detachments (beginner cheat sheet)
-
Advanced Acquisition Cadre: pick this if you want to learn stealth movement, safe angles, and “reveal then delete” play.
-
Auxiliary Cadre: pick this if you want better objective play and spotting support so your shooting always has a target.
-
Experimental Prototype Cadre: pick this if you want commanders/battlesuits to be the centrepiece and you like decisive Deep Strike turns.
Mini glossary (for new players)
-
Deep Strike: arriving onto the battlefield mid-game instead of deploying normally.
-
Screening: placing units to block enemy movement or prevent Deep Strike into an area.
-
Focus fire: committing multiple units to kill one priority target completely.
-
Trading: sacrificing a unit to remove something more valuable or to gain tempo on objectives.
These detachments can be combined in all sorts of ways, as each of them only costs 1 Detachment Point, and most of those found in Codex: T’au Empire only cost 2. In a 2,000 point game,* you could mix the Advanced Acquisition Cadre with Kauyon to help keep your troops safe into the late game, where many of their detachment abilities start to shine.
* Which gives you 3 Detachment Points to spend.